Leather Shoe and Boot Care UK: Conditioning, Polishing and Waterproofing
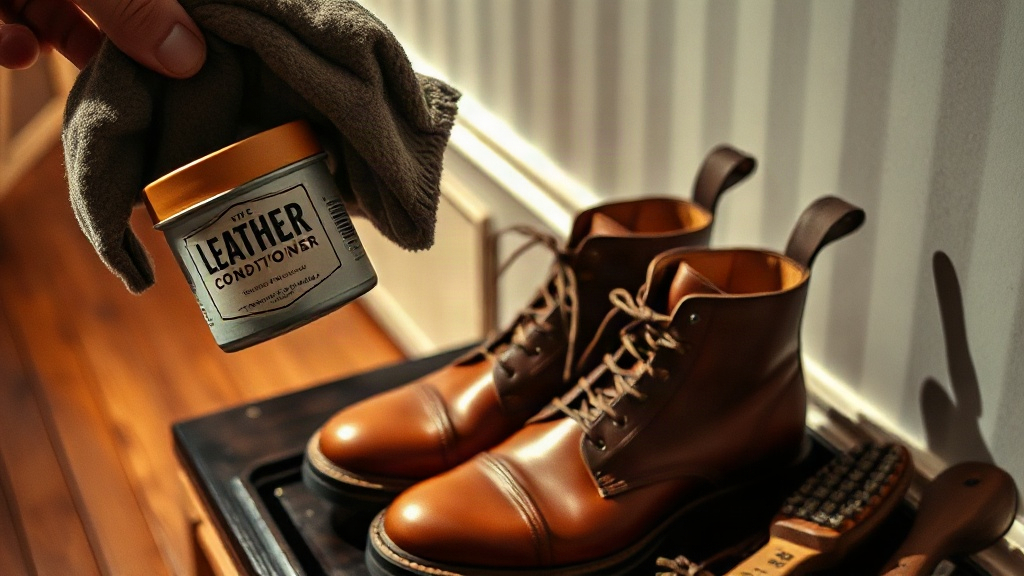
The Met Office reports UK footwear faces rain or road salt exposure on 150-180 days each year. This high frequency means leather conditioning can’t follow a relaxed schedule.
As an Amazon Associate we earn from qualifying purchases. This page contains affiliate links — if you buy through them, we earn a small commission at no extra cost to you.
You take off your favourite leather boots after a wet commute, expecting them to feel soft and supple. Instead, they feel stiff, and the leather looks dull and lifeless. The problem isn’t the leather — it’s what the UK’s weather has been doing to it while you weren’t looking.
That stiffness is the first sign of oil depletion. Left unchecked, it leads to cracking, and cracking on a good pair of leather boots is expensive to fix. This isn’t about being precious with your shoes; it’s about understanding what’s actually happening to the material so you can stop it.
This article covers the three things that matter for leather shoe and boot care in the UK: conditioning to replenish what rain and road salt strip away, waterproofing to keep moisture out in the first place, and knowing why suede needs a completely different approach. No sales pitch, no £20 spray recommended for a £3 fix — just what’s worth doing.
Why UK Conditions Demand More Frequent Care
Standard leather care advice often assumes less frequent wet-dry cycles than UK conditions create. General guidance might suggest conditioning every few months, but our climate often requires more attention.
Frequent rain, winter road salt, and central heating create what makers of quality footwear call wet-dry cycles — the leather gets wet, then dries quickly, and each cycle pulls more natural oils out of the material. Road salt can exacerbate this effect. Central heating at home does the same in the evenings.
These conditions can accelerate oil depletion. You may need to condition more frequently than standard advice suggests — not because of a specific formula, but because your leather is working harder to hold onto its oils.
The tell-tale sign is stiffness that wasn’t there when the boots were new, or leather that looks flat and loses its colour. That’s the moisture and oils gone, before the fibres start to crack. For daily commuters, this can happen faster than expected.
Factor in your actual exposure. If you’re wearing leather boots every day through a UK winter, condition more often than the six-month rule. If you’re a weekend walker, three to four months during wet weather may be closer to the mark. The short version is this: if the leather has been wet and you’re not conditioning it, you’re running a deficit.
Conditioning Smooth Leather: The Right Sequence
Conditioning isn’t complicated, but the order of operations matters. Skip the prep step and you’re grinding dirt into the leather as you apply the conditioner — which defeats the purpose.
First, remove surface dirt with a soft brush or a barely-damp cloth. This gets debris out of the creases and away from the seams before anything else goes on. Skipping this step is the most common mistake — the conditioner can’t penetrate properly if there’s a layer of road grime sitting on top.
Second, test on a hidden area. Apply a small amount to the inside of the ankle or the heel tab and wait a few minutes. Most modern conditioners are neutral, but this checks for any unexpected colour shift before you work it over the whole boot.
Apply with circular motions using a soft cloth or a dedicated applicator. A small amount goes a long way — you’re replenishing oil, not coating the surface. Work it into the leather gradually.
Let it sit for the time recommended by the product. This allows it to penetrate fully before you buff anything off.
Buff with a clean, dry cloth. This removes the excess and starts building a natural shine. For dress shoes, you can follow with a dedicated polish; for casual boots, this step alone is often enough.
Let them air dry away from direct heat. Not on a radiator, not in front of a fire. Rapid drying undoes the conditioning you’ve just done.
On products: the Saphir Renovator Cream (paid link) is the premium pick — it cleans, nourishes, and adds a genuine shine without changing the colour. It isn’t cheap, but it does what it says on the tin. For those wanting a more modest spend, the Renapur Leather Balsam (paid link) restores old or stiff leather with a natural finish. It won’t waterproof — keep that distinction in mind.
See Renapur Leather Balsam on Amazon → (paid link)
Check Saphir Renovator Cream price → (paid link)
A decent conditioner makes the leather feel supple again within hours. Disappointing results usually come down to over-applying it or expecting it to hide deep scuffs, which isn’t what conditioning does.
Waterproofing and Conditioning: Understanding the Difference
These are two different jobs, and confusing them is where a lot of leather care falls apart.
Conditioning restores oils. That’s job one — it keeps the leather soft and prevents cracking. It does not create a water-repellent barrier. You can condition a boot every week and still watch water soak straight through it.
Waterproofing — whether a wax or a spray — creates a physical barrier on the surface that repels water. That barrier makes rain bead off rather than soaking in. But it doesn’t replenish the oils inside the leather.
What this means: you need both. Condition first to nourish the leather, then apply waterproofing to protect the surface. They’re not interchangeable — they’re sequential.
A simple way to check if waterproofing needs reapplying is the water beading test. If you splash water on the upper and it no longer beads and runs off, the repellent layer has worn down and it’s time to reapply. In a wet UK winter, this might mean reapplication every few weeks on frequently-worn footwear.
Wax-based waterproofers work well on smooth leather and can condition slightly as they go. Spray protectors are easier to apply evenly and work on fabric elements too, though products like the Tarrago Universal Protector (paid link) have a strong smell — use it somewhere ventilated.
See Tarrago Universal Protector on Amazon → (paid link)
The Grangers Footwear Repel Plus (paid link) is solid for routine waterproofing on outdoor footwear — it restores repellency on older boots without changing the feel. Regular reapplication is necessary, particularly on heavily-used walking boots.
Check Grangers Footwear Repel Plus price → (paid link)
Caring for Suede and Nubuck
Suede is raised leather fibre, not smooth leather. That difference matters more than most care guides acknowledge. Conditioner isn’t suitable for suede — it sits on the surface and can flatten the nap, making the material look worse rather than better.
For suede and nubuck, the routine is different: a dedicated protector spray applied before the first wear, a suede eraser or cleaning stone for light marks, and a wire brush to revive the nap after cleaning.
The suede eraser is a useful tool for light maintenance — effective for surface marks and shine removal, though it’s not a deep-cleaning solution. It won’t shift stubborn staining, but for regular upkeep it works well. The Kaps cleaning stone (paid link) offers similar performance at a lower price point.
View Kaps cleaning stone on Amazon → (paid link)
The wire brush revives the texture after wear or cleaning. It’s the step that brings the nap back up and makes suede look fresh again. Various options exist from basic brushes to more durable professional versions.
Never soak suede, and avoid liquid cleaners unless the label specifically says suede-safe. Excessive moisture can cause shrinkage, staining, and stiffness that is difficult to reverse. If the suede gets genuinely wet, stuff it with newspaper to absorb the moisture and let it dry slowly, away from heat.
For anyone wearing suede regularly through a UK winter, a protector spray is not optional — it’s the only realistic barrier against rain staining. Apply it before the first wear, and reapply after cleaning.
All-in-One Care Kits
If you’d rather not piece together individual products, a leather boot care package that combines conditioning and waterproofing is worth considering. Some packages pair conditioning wax with waterproofing spray alongside a cleaning brush. The advantage is that both jobs are covered with compatible products from the same maker, which removes the guesswork.
These bundles can offer convenience and guaranteed compatibility. The trade-off against buying separately is cost — you’re paying for the bundled approach.
What these kits typically don’t include: moisture-absorbing material. For boots that have got genuinely wet, stuffing them with newspaper or using dedicated cedar shoe trees afterward is still down to you. That’s not a failing of the kit — it’s just a reminder that conditioning and waterproofing handle the prevention; drying handles what moisture has already got in.
Common Questions Answered
Can I use conditioner on suede?
No. Conditioner sits on the surface of suede rather than penetrating, and it can flatten the nap and leave marks. For suede and nubuck, use a dedicated protector spray and a suede eraser or brush for cleaning. That’s the only approach that actually works.
How often should I waterproof my boots?
Reapply whenever water stops beading on the upper. In the UK during winter, this can mean every few weeks on daily-wear boots. There’s no fixed schedule — the test is simple: splash on some water and see what happens.
Why do my leather boots smell?
Moisture and bacteria trapped inside the boot. The fix is straightforward: use cedar shoe trees when you’re not wearing them to absorb moisture from the inside, and let boots air out properly between wears. If the smell persists after a few days of resting in cedar trees, a dedicated leather deodoriser spray can help, but the underlying cause is usually damp that hasn’t dried out.
Is it better to polish or condition?
Conditioning is the more important job. Polish adds shine and a thin protective layer, but it does nothing for the leather’s suppleness. Cracking happens when leather dries out, not when it lacks shine. Condition first, polish after if you want the finish — but don’t skip the conditioning.
Seasonally, your priorities should shift. In autumn, apply waterproofing before the first frost and perform a deep condition after summer storage. During winter, check waterproofing monthly and condition if the leather feels stiff. In spring, perform a deep conditioning after the salt season ends and reduce waterproofing frequency. In summer, a light conditioning is sufficient, and ensure protective storage during holidays.
Your UK Leather Care Strategy
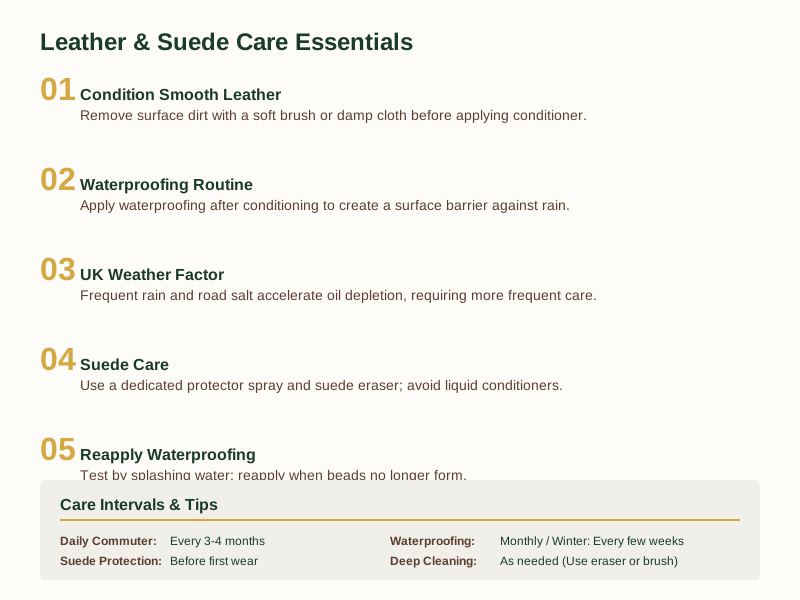
The basics come down to this: UK weather makes conditioning more necessary than most guides assume, waterproofing and conditioning are two separate jobs that need doing together, and suede requires its own routine rather than a modified version of smooth leather care.
If you’ve read this far, you already know more than most people picking up a leather care product in a shop. The next step is applying it consistently — which is where most people fall short.
Rather than trying to remember everything, grab the checklist. It runs through the routine in order so you can work through your boots or shoes without second-guessing what comes next. No jargon, no product pressure — just the steps.
Get the Free Suede & Leather Care Checklist
Explore More Topics
Quick answers:
Go deeper on specific topics:
- How Often Should You Actually Condition Leather Shoes?
- Leather Shoe Cream vs Wax Polish: What Each One Is Actually For
- How to Stop Leather Shoes Cracking at the Crease
- Are Leather Shoe Care Kits Worth It, or Can You Buy the Pieces Separately?
References
As an Amazon Associate we earn from qualifying purchases. The shoes and court kit linked above are ones we recommend based on independent research and owner feedback.
Note: General guidance only, verify details with a qualified professional or official source.